ShoulderStand Adjustments

We begin our journey into Shoulder Stand Posture. We start with a playful, partner sequence to open up the shoulders and hips! The older we get, the more likely we are, to slump our posture and rolls our shoulders forward, closing off our heart.

We begin our journey into Shoulder Stand Posture.
We start with a playful, partner sequence to open up the shoulders and hips!
The older we get, the more likely we are, to slump our posture and rolls our shoulders forward, closing off our heart.

The fun, accessible and definitely challenging yoga posture is called Side Plank Dolphin with one leg extended. Did you know?  Anytime you lift your arms above your head.  You are taking a backbend. Did you know in an entire week, most people will not take one single backbend.

The fun, accessible and definitely challenging yoga posture is called Side Plank Dolphin with one leg extended.
Did you know? Anytime you lift your arms above your head. You are taking a backbend.
Did you know in an entire week, most people will not take one single backbend.

Modification of Cow Face Arms. Extend one arm above your head, bend the elbow and reach for that elbow with the opposite hand. Lift up the elbow and open up the triceps, helping the body and shoulder get a nice stretch. Also, wonderful to ignite the lymphatic system and detox the body.

Modification of Cow Face Arms.
Extend one arm above your head, bend the elbow and reach for that elbow with the opposite hand.
Lift up the elbow and open up the triceps, helping the body and shoulder get a nice stretch.
Also, wonderful to ignite the lymphatic system and detox the body.

Partner Shoulder Opening from Behind Interlace your hands behind you and allow your partner to use one hand to pull your arms back. Take the second hand and place behind your partner's shoulders and press shoulders forward slowly and gently. This dual action is a great shoulder opening-aaaHH!

Partner Shoulder Opening from Behind
Interlace your hands behind you and allow your partner to use one hand to pull your arms back.
Take the second hand and place behind your partner's shoulders and press shoulders forward slowly and gently.
This dual action is a great shoulder opening-aaaHH!

Shoulder Lift Assist From seated position, lift both arms above the head and reach for opposite elbow. Have your partner reach for your elbows and gently pull them up and back slightly. Keep your rib cage soft and down!  Breath.

Shoulder Lift Assist
From seated position, lift both arms above the head and reach for opposite elbow.
Have your partner reach for your elbows and gently pull them up and back slightly.
Keep your rib cage soft and down! Breath.

Four Arm Downward Dog Have your partner take the Downward Dog position. Place your feet on your partners pelvis and walk them in closer together, keeping the action of moving their low back muscles upward and back. While in Downward Dog, feel the support for your upper arms and the lengthening of the back legs.  This is very grounding and soothing to the limbic system and body.

Four Arm Downward Dog
Have your partner take the Downward Dog position. Place your feet on your partners pelvis and walk them in closer together, keeping the action of moving their low back muscles upward and back.
While in Downward Dog, feel the support for your upper arms and the lengthening of the back legs. This is very grounding and soothing to the limbic system and body.

Partner Shoulder Opening from Behind This photo taken from a completely different angle demonstrates the lengthening of the collar bones, the lift up from the sternum and the opening of the heart.  You feel better just looking at this person!

Partner Shoulder Opening from Behind
This photo taken from a completely different angle demonstrates the lengthening of the collar bones, the lift up from the sternum and the opening of the heart. You feel better just looking at this person!
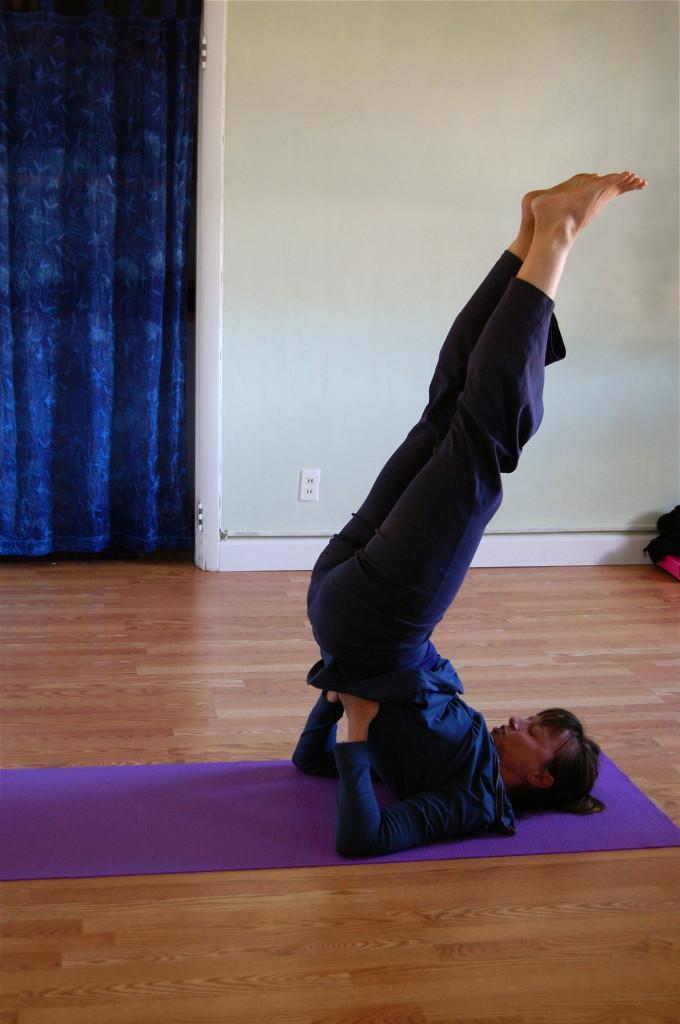
Candlestick Posture. Anytime, you are teaching at a corporation or location that does not have adequate props and blankets, always protect the C-7 vertebrae by having your student take their legs to a 75 degree angle.  Unless you are advanced yoga students who prefers full shoulder stand and is fully aware of the risks involved, start with this one.  This is a safe modification perfectly accessible to any student with any level of background.

Candlestick Posture.
Anytime, you are teaching at a corporation or location that does not have adequate props and blankets, always protect the C-7 vertebrae by having your student take their legs to a 75 degree angle. Unless you are advanced yoga students who prefers full shoulder stand and is fully aware of the risks involved, start with this one. This is a safe modification perfectly accessible to any student with any level of background.
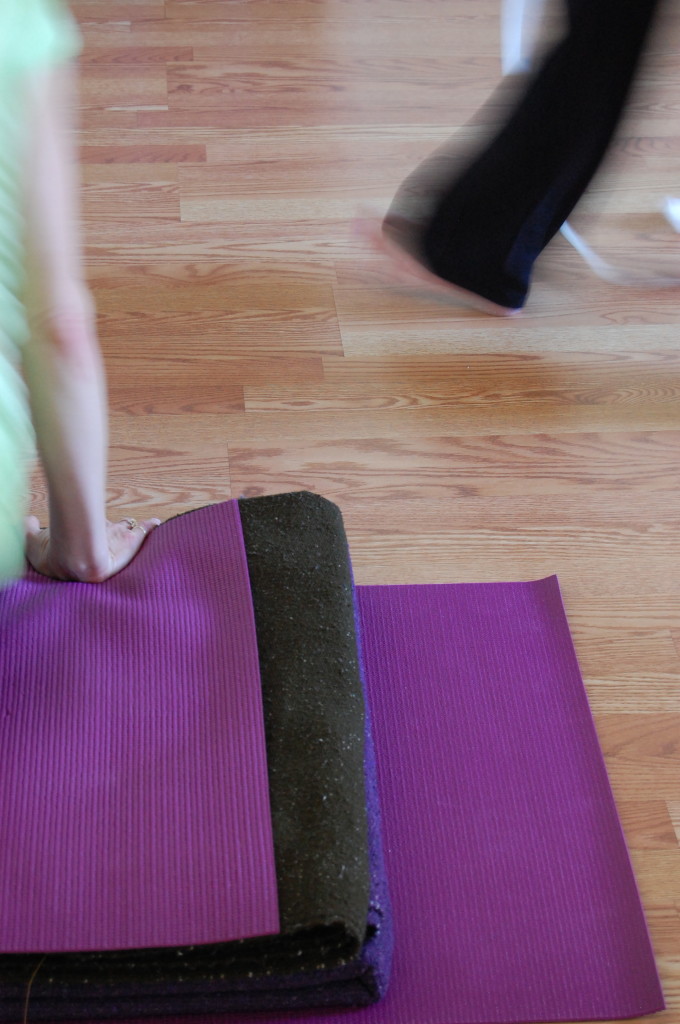
 
Preparation of ShoulderStand The use of and placement of the blankets is extremely important when creating a safe Shoulderstand.   Make sure to have at least 2-4 blankets with the smooth edge stacked one on top of the other. Bring the sticky mat 2 inches from the edge, ensuring that when you roll with you back onto this support, the neck will not be on the sticky mat, just the elbows.
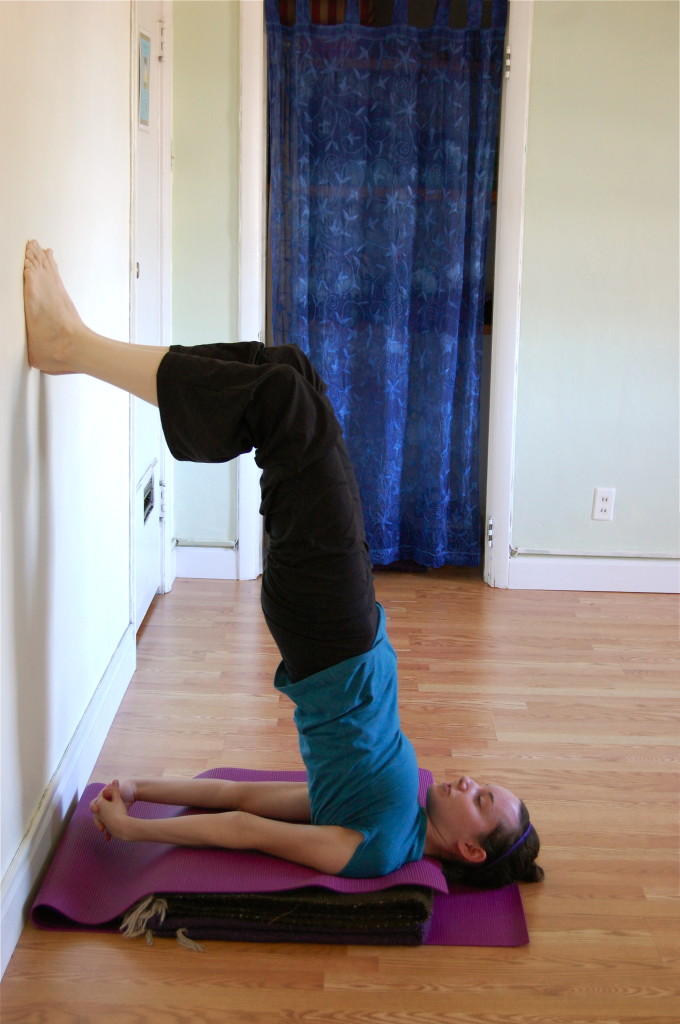
Preparation of ShoulderStand
The use of and placement of the blankets is extremely important when creating a safe Shoulderstand. Make sure to have at least 2-4 blankets with the smooth edge stacked one on top of the other. Bring the sticky mat 2 inches from the edge, ensuring that when you roll with you back onto this support, the neck will not be on the sticky mat, just the elbows.

Now we want to take that lift from the front the chest and do it upside down! If you look carefully at this photo, our student, has the sticky mat too far forward.  No mind.   Keep trying!  Her positioning with the walk up and help with the wall is lovely. If it helps her to try to life up out of the shoulders. I would recommend that she take her hands and walk them down her back toward the floor for added support. Right now her hands are interlaced and arms straight, providing a nice support and opening for her torso and upper chest.
Now we want to take that lift from the front the chest and do it upside down! If you look carefully at this photo, our student, has the sticky mat too far forward. No mind. Keep trying!
Her positioning with the walk up and help with the wall is lovely. If it helps her to lift up out of the shoulders even more, and she has already elongated her arms and established the external rotation of the shoulders, I would then recommend she take her hands to her back body and feel even greater support. Right now her hands are interlaced and arms straight, providing a nice support and opening for her torso and upper chest.

Shoulderstand Assist with the Use of A Chair. This pose may look awkward, but it feels great.  When we place our sacrum onto the sticky mat at the edge of the chair and grab the two sides of the chair with our arms, we really feel a big stretch in the upper chest.  It feels like your doing the wheel or backbend inside of an inversion, something that absolutely feels right, light and natural to the lines of the body.
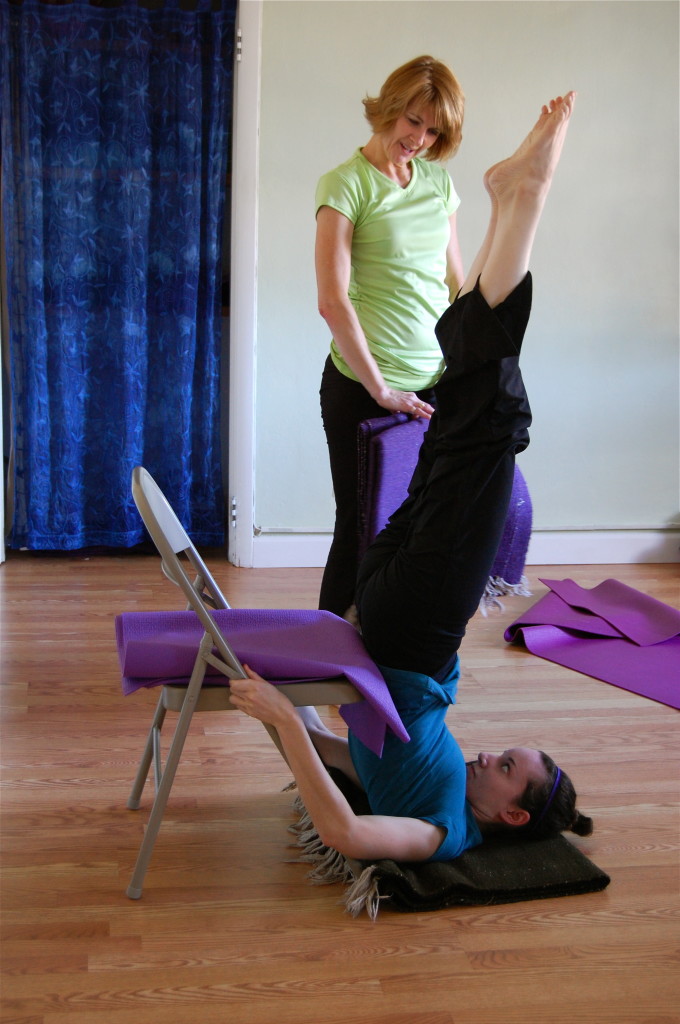
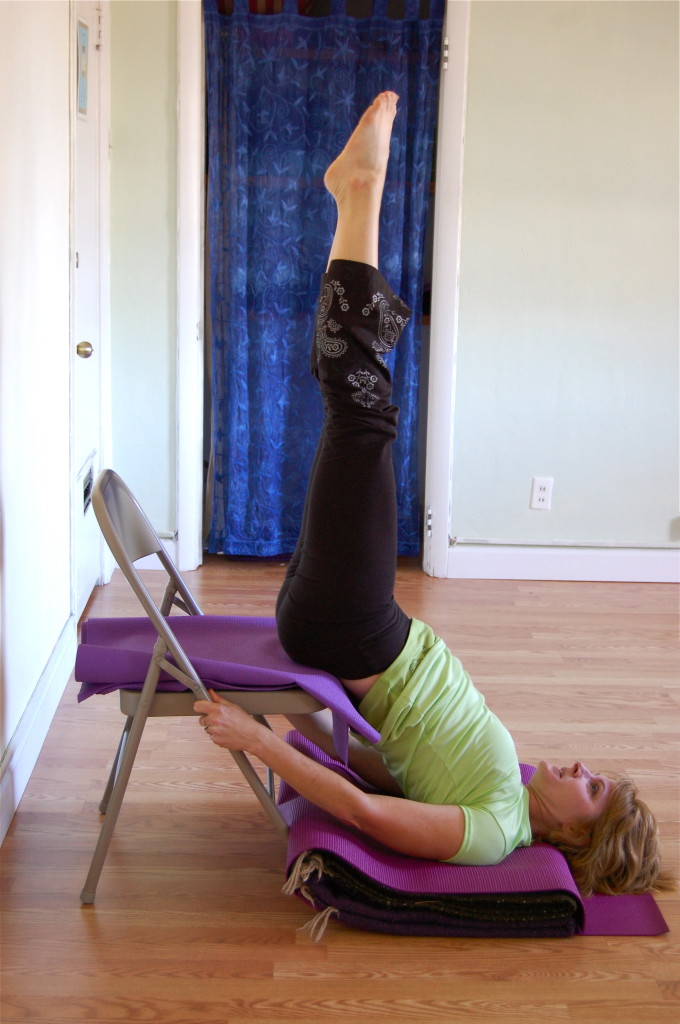
Shoulderstand Assist with the Use of A Chair.
This pose may look awkward, but it feels great. When we place our sacrum onto the sticky mat at the edge of the chair and grab the two sides of the chair with our arms, we really feel a big stretch in the upper chest. It feels like your doing the wheel or backbend inside of an inversion, something that absolutely feels right, light and natural to the lines of the body.

Shoulderstand with the improper use of the Chair Can you tell me what is wrong here?   The blankets that were intended to go under her shoulders to support a nice healthy cervical spine are still in Joni's hands! No worries, moments like this prompted this very useful visual aid to help Clayton Yoga students remember how to set up for each pose safely and get much better results.
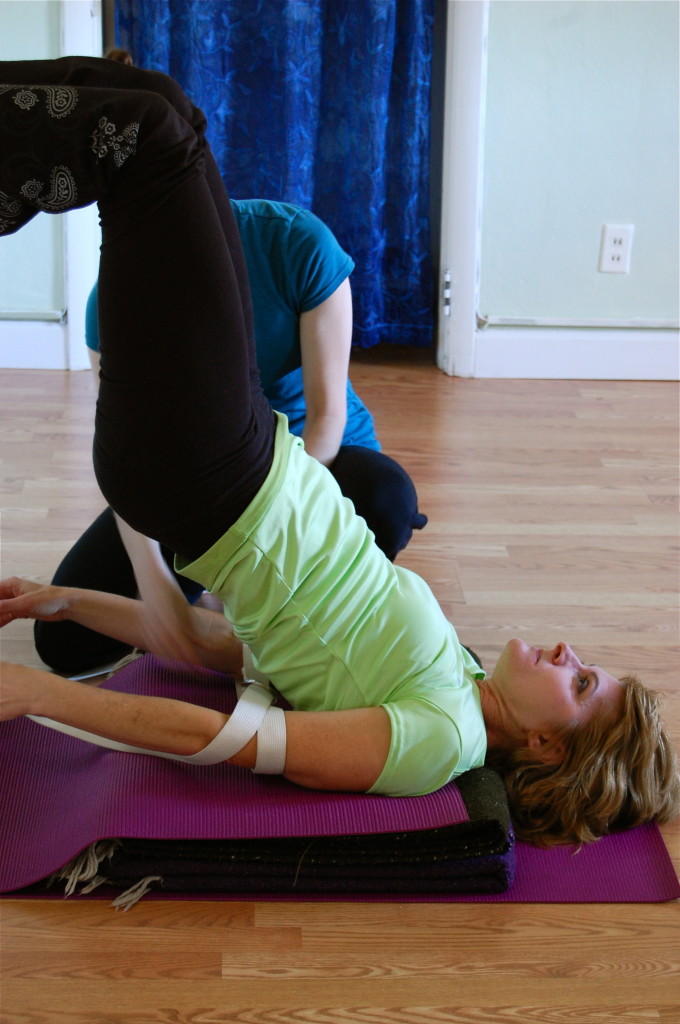
Shoulderstand with the improper use of the Chair
Can you tell me what is wrong here? The blankets that were intended to go under her shoulders to support a nice healthy cervical spine are still in Joni's hands! No worries, moments like this prompted this very useful visual aid to help Clayton Yoga students remember how to set up for each pose safely and get much better results.

This pose is going to turn out great.  Now we are using not just a sticky mat in the correct placement. We are also using 3 blankets folded nicely on top of one another.  Also, we have a strap going around the arms to keep the elbows in and again support and tall torso and open upper back and shoulder. This takes more work, it requires patience, but the results will be BEAUTIFUL.
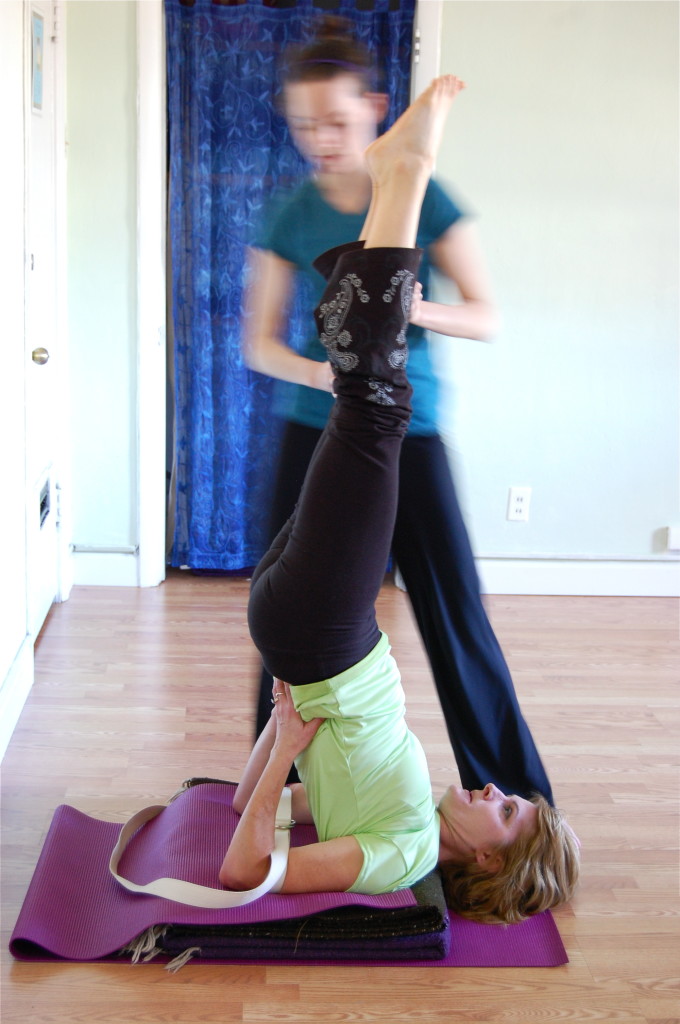
This pose is going to turn out great. Now we are using not just a sticky mat in the correct placement. We are also using 3 blankets folded nicely on top of one another. Also, we have a strap going around the arms to keep the elbows in and again support and tall torso and open upper back and shoulder. This takes more work, it requires patience, but the results will be BEAUTIFUL.

Like a springboard, when your ready to lift legs above torso, simple push into your arms and elbows and Voila!...
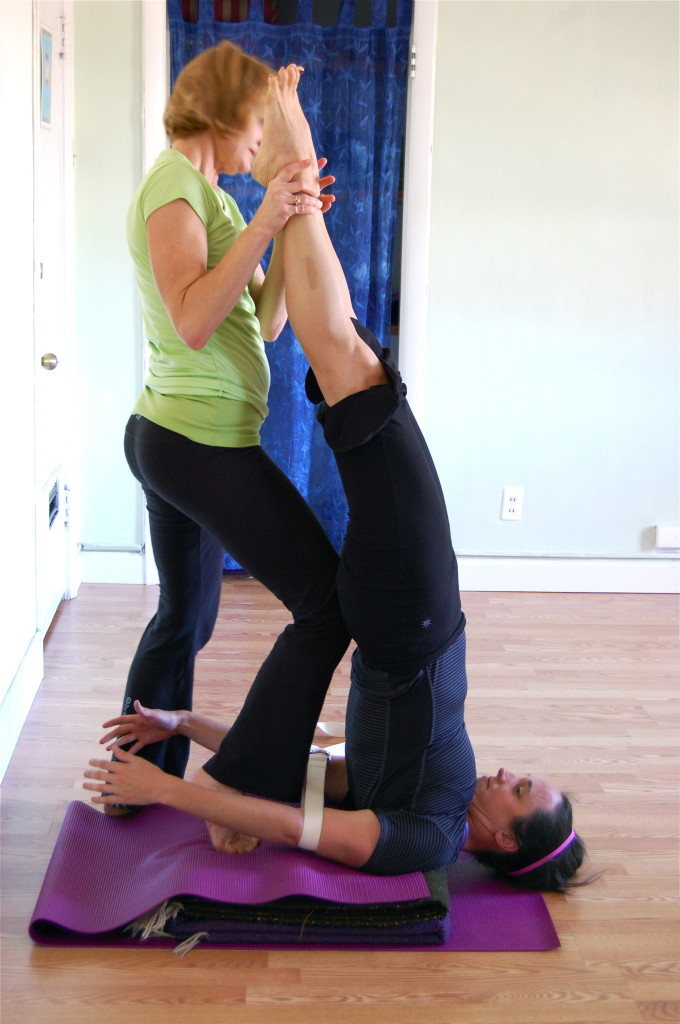
Like a springboard, when your ready to lift legs above torso, simple push into your arms and elbows and Voila!...

This Shoulderstand Assist is the next and wonderful step up!  Notice how Joni is coming from behind, grabbing both legs and pushing her knee into Stacey's tailbone. While lifting the legs upwards and pressing forward with the knee, Stacie is going to experience a lift and length in the pose like never before.  You can see she is somewhat skeptical at first.  I remember when I first had this adjustment and felt the same way.  Let's look at the others practice and see the progression..

This Shoulderstand Assist is the next and wonderful step up! Notice how Joni is coming from behind, grabbing both legs and pushing her knee into Stacey's tailbone. While lifting the legs upwards and pressing forward with the knee, Stacie is going to experience a lift and length in the pose like never before. You can see she is somewhat skeptical at first. I remember when I first had this adjustment and felt the same way. Let's look at the others practice and see the progression..
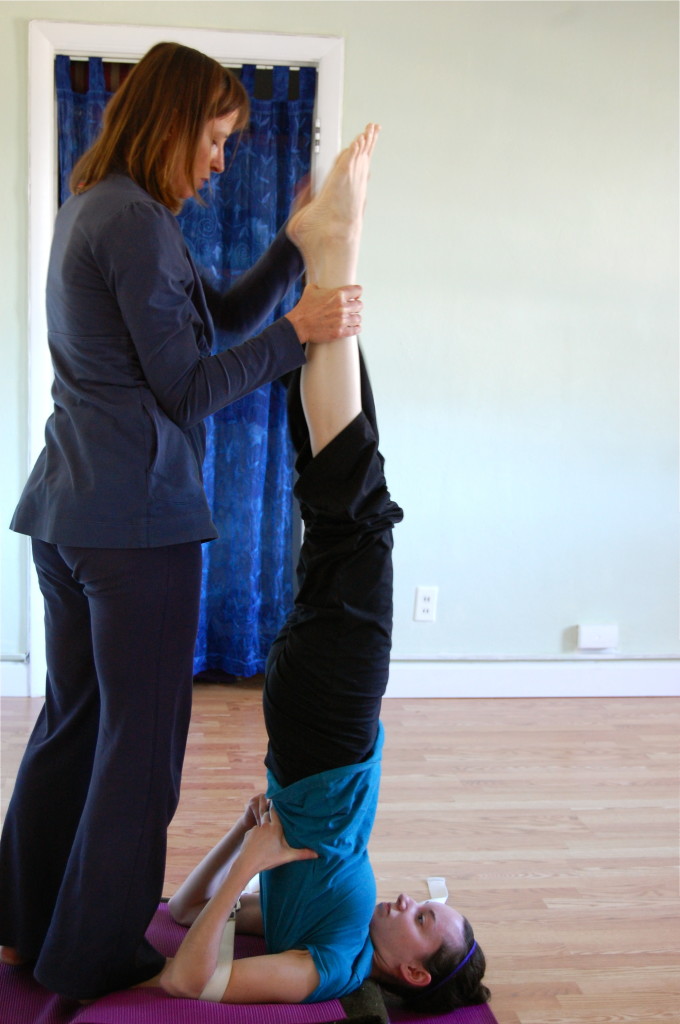
Same technique two different people!...

Same technique two different people!...

Again, pressing into the tailbone while lifting up the legs, helping to find tadasana in this upside down Posture called 'The Queen".
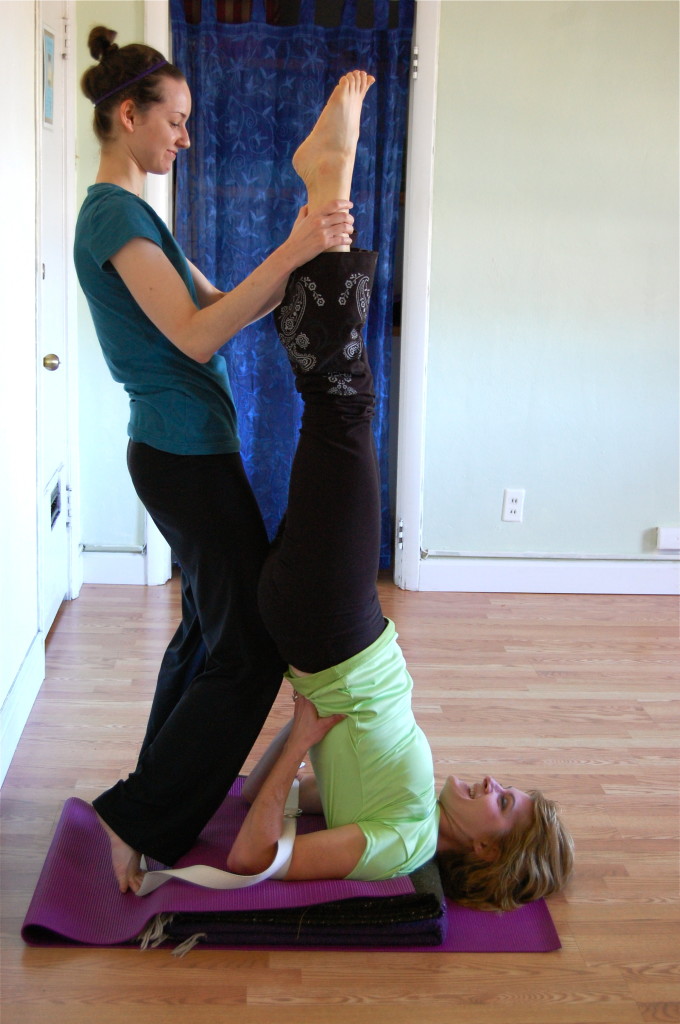
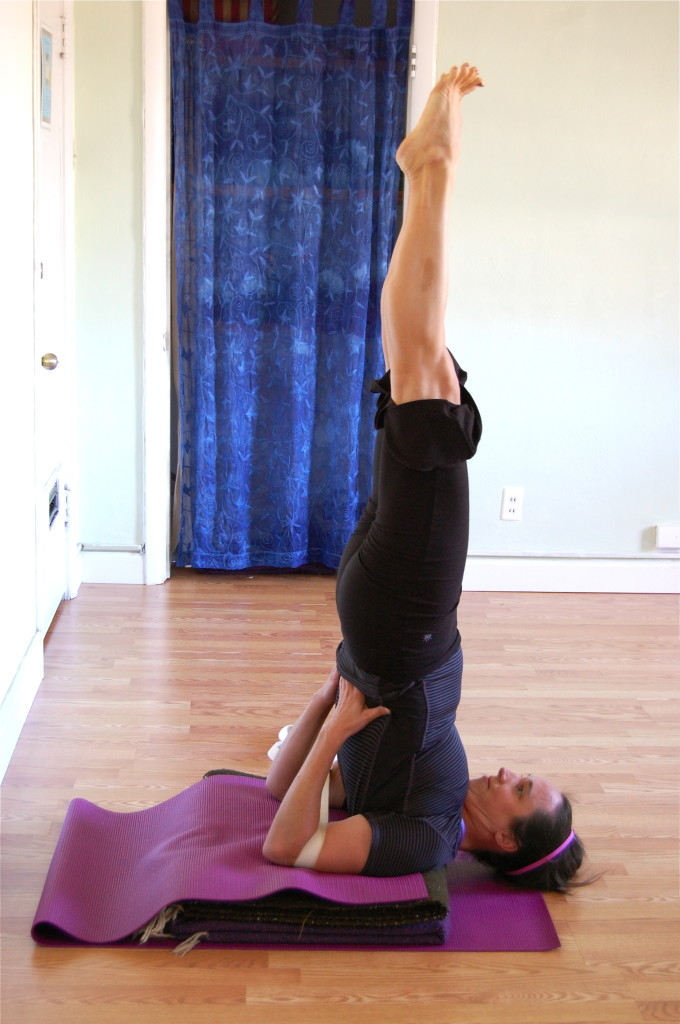
Again, pressing into the tailbone while lifting up the legs, helping to find tadasana in this upside down Posture called 'The Queen".
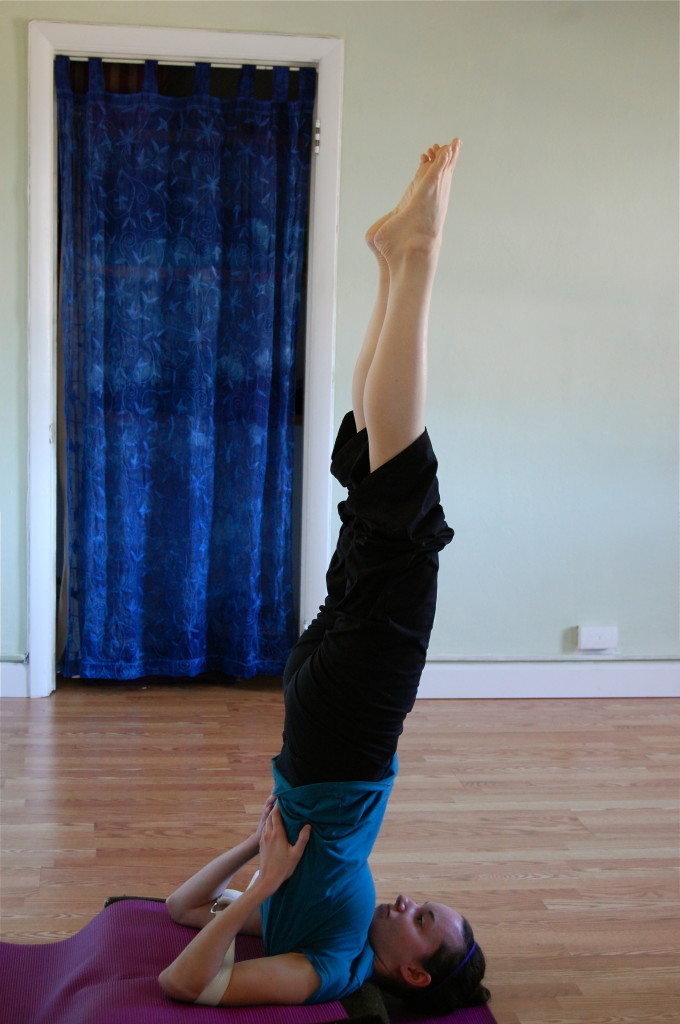
Bellisima!  Stacey is on her own.  And she is standing tall upside down, completely safe and supportive to her spine.  Way to go...

Bellisima! Stacey is on her own. And she is standing tall upside down, completely safe and supportive to her spine. Way to go...

You can see once the correct support and preparation is there, how effortless the posture and the results can be!  Have Fun....

You can see once the correct support and preparation is there, how effortless the posture and the results can be! Have Fun....


3 thoughts on “ShoulderStand Adjustments

  1. This has really been helpful in opening up my shoulders. I still have not perfected a shoulderstand but have come a long way!

  2. I have horrible upper back/shoulder/neck issues. I cannot express enough how divine these movements feel! Each step/pose are well put together and very easy to understand.

  3. I have found that plow pose and assisted bridge poses are a great way to prepare for shoulder stands. It is also a great release for lower back and abdomen and an aid in clearing the thyroid.

Please Login to Comment.